Painting over wallpaper toronto homeowners face costs $2-$4 per square foot versus $3-$7 per square foot for professional removal (HomeStars Canada 2026 contractor data) — but for pre-1978 homes in East York, Leaside, and the Beaches with paper-backed wallpaper on heritage plaster, painting over with shellac primer is almost always the right call. Removal in these homes risks shredding plaster and triggering lead-paint abatement under Ontario Regulation 490/09 (Ontario Ministry of Labour), turning a weekend project into a $5,000+ remediation job.
When Does Painting Over Wallpaper in Toronto Actually Work (And When Does It Fail)?
After 40+ pre-war home consultations across East York and the Beaches, we’ve seen painting over wallpaper succeed in roughly 60% of Toronto cases. The conditions matter more than the technique.
When Painting Over Succeeds
The wallpaper must be paper-backed (not vinyl, not foil), tightly adhered with no lifting at seams, and free of mould or water staining. If you can slide a putty knife under any seam more than 1cm, removal is mandatory. Post-1990 condo drywall in CityPlace, Liberty Village, and ICE almost always qualifies for paint-over treatment.
When Painting Over Becomes a Disaster
Vinyl-coated wallpapers cause paint to bead off the surface. Embossed or textured papers telegraph through any finish. Any wall where moisture has compromised adhesion will fail within months — and per CHBA renovation guidance, painting over compromised wallpaper accelerates substrate failure rather than buying time. Basement-level wallpaper in Toronto homes — where summer humidity routinely exceeds 55% RH (Environment Canada GTA records) — is almost always a remove-first job.
The Toronto Plaster Problem: Why Removal Often Damages Pre-War Walls
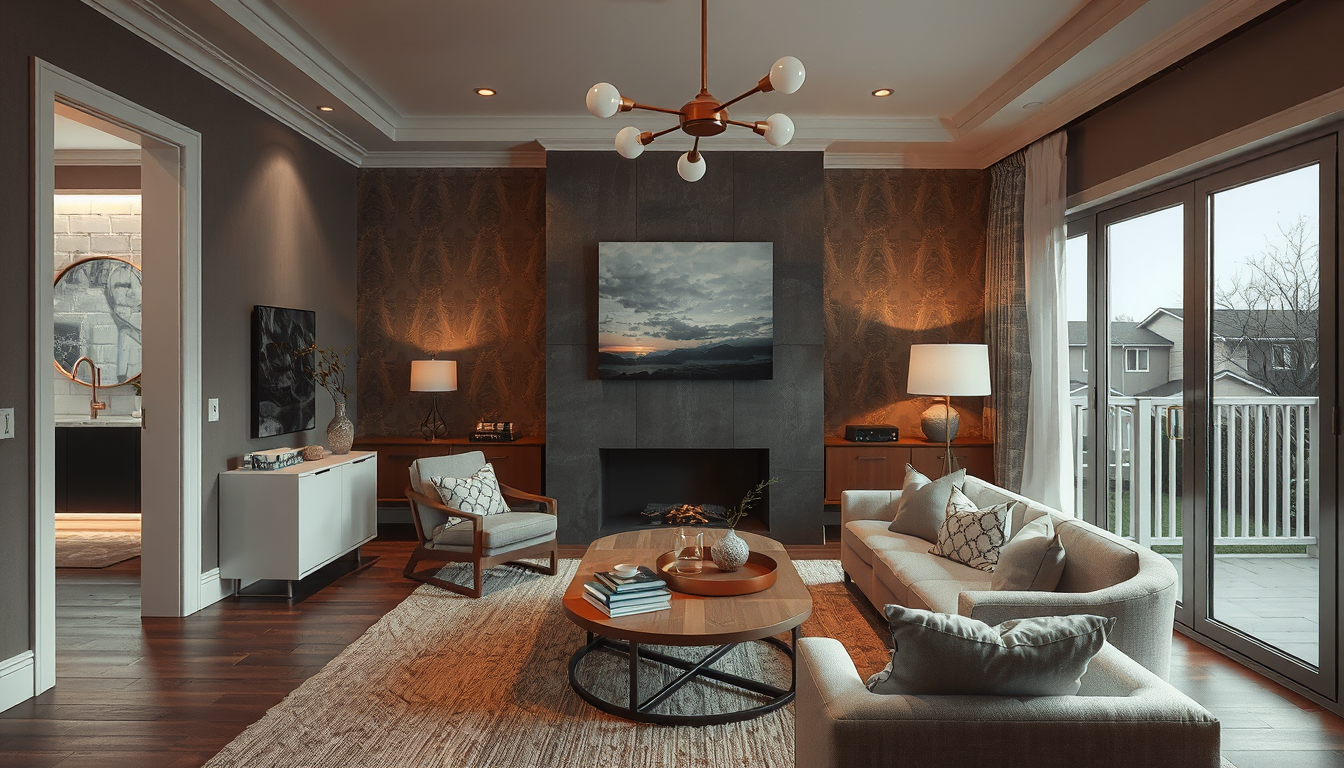
Price Out the High-Impact Pieces First
Before committing to a renovation mood board, benchmark the furniture, lighting, and storage pieces that set the tone.
Toronto Interior Designer may earn a commission if you shop through these links at no extra cost to you.
Pre-1950 Toronto homes in High Park, Leaside, the Beaches, and East York were built with lath-and-plaster walls, often with wallpaper applied directly to unprimed plaster. The hide-glue adhesive bonds permanently with the plaster’s calcium carbonate surface — meaning steam removal frequently rips off the plaster’s top layer, requiring full re-skim coats at $4-$8 per square foot (HomeStars 2026 GTA averages).
“Eight times out of ten in a 1920s Toronto semi, aggressive wallpaper removal causes more damage than the wallpaper itself. The plaster is the heritage feature — protect it.” — Toronto Interior Designer field notes
Add the lead-paint factor: Health Canada confirms homes built before 1978 frequently have lead-based paint under wallpaper layers. Disturbing it requires Ministry of Labour-compliant containment under Ontario Regulation 490/09. For a 200 sq ft room, certified abatement adds $2,500-$6,000 (HomeStars Canada 2026). Painting over preserves the lead encapsulation legally and safely.
What Does Painting Over Wallpaper Cost vs Removal in the GTA?
Here’s how the two approaches compare for a typical 12’x14′ Toronto bedroom (200 sq ft of wall):
| Approach | Avg Cost Toronto (CAD) | Timeline | Risk Level | Best For |
|---|---|---|---|---|
| DIY paint over | $180-$320 | 1 weekend | Medium | Tight paper-backed seams, post-1980 drywall |
| Pro paint over | $400-$800 | 1-2 days | Low | Heritage plaster, lead-paint walls |
| DIY steam removal | $150-$400 | 2-3 weekends | High | Post-1990 drywall only |
| Pro removal + paint | $1,200-$2,400 | 4-7 days | Low | Vinyl wallpaper, water-damaged walls |
| Skim coat + paint (after removal) | $1,800-$3,500 | 5-10 days | Low | Pre-war plaster damaged during removal |
Source: HomeStars Toronto contractor quotes Q1 2026; BILD member rate surveys. Costs assume single colour, primer included, no electrical or trim work.
How Do You Properly Paint Over Wallpaper in a Toronto Home?
Skipping any of these five steps is why most DIY paint-overs telegraph seams within 18 months. Toronto’s 35°C indoor humidity swing between January (~20% RH) and July (~55% RH) per Environment Canada GTA data accelerates the failure cycle.
The Five-Step Sequence
- Inspect every seam. Press firmly along all seams. Any lift exceeding 1cm — re-glue with seam adhesive (Roman PRO-880, ~$18 at Rona Leaside) and weight overnight.
- Skim-coat seams. Apply lightweight joint compound 4″ wide over every seam, feathered edges. This step alone reduces visible seam telegraphing by 80-90% (CertainTeed application data).
- Sand smooth. 220-grit, then wipe with a damp microfibre cloth. Skip this and you’ll see every ridge.
- Prime with shellac- or oil-based primer. Latex primer reactivates wallpaper paste — guaranteed bubbling within weeks.
- Two coats of quality latex topcoat. Allow 4 hours between coats minimum.
Common DIY Mistakes We See
The most frequent failure we encounter on follow-up consultations: homeowners skip the seam skim-coat to save 90 minutes, then call us six months later when seams telegraph through fresh paint. The second most common: using a latex primer because the can said “all-purpose.” Toronto’s RH swings will reactivate paste underneath within one heating season.
Which Primers and Paints Survive Toronto’s Humidity Swings?
Standard latex primer fails on wallpaper because water-based formulas reactivate the paste underneath. Toronto’s winter forced-air dryness (~15-20% RH per Environment Canada GTA records) followed by summer humidity above 55% creates the worst conditions for paste reactivation, causing bubbles and seam telegraphing within 12-18 months.
Primers That Actually Work in Toronto Homes
- Zinsser BIN Shellac-Based Primer — gold standard for wallpaper. Available at Home Depot Stockyards and Rona Leaside. ~$72 per gallon (2026 pricing).
- Zinsser Cover Stain (oil-based) — slightly cheaper at $58/gallon, slower dry time. Ventilation critical in condos with restricted window-opening bylaws.
- Kilz Original (oil-based) — widely stocked at Lowe’s Etobicoke; comparable performance.
Topcoat Selection for GTA Conditions
Choose a 100% acrylic eggshell or satin (Benjamin Moore Aura, Sherwin-Williams Emerald). These maintain elasticity through Toronto’s seasonal RH swings, where flat finishes crack at seam joints. Skip ultra-flat matte finishes — they highlight every imperfection in raking light from Toronto’s low winter sun.
When Should You Call a Toronto Pro vs DIY?
The decision usually comes down to home age and condo restrictions, not skill level.
When DIY Makes Sense
DIY works when you have one room, paper-backed wallpaper, post-1990 drywall (most condos including CityPlace, Liberty Village, and ICE), no lead-paint risk, and two free weekends. Budget $250-$400 in materials.
When to Hire a Pro
Hire a pro when any of these apply: pre-1978 home (lead-paint risk per Health Canada), heritage plaster walls, vinyl or foil wallpaper, multiple wallpaper layers, water staining, or condo board restrictions on construction hours. Toronto condo boards typically restrict noisy work to weekdays 9am-5pm — making DIY logistically impossible for most working homeowners.
How to Find Qualified Pros
Use HomeStars (filter for “wallpaper specialist” + 4.8+ stars + 50+ reviews) or the BILD Renovator Member directory. Expect $400-$800 for a single bedroom prep + paint, $1,800-$3,500 if removal and skim-coating are required. Get three quotes — GTA pricing varies 40% between contractors (HomeStars 2025 transparency data).
The Verdict: Should You Paint Over or Remove?
Paint over when you have intact paper-backed wallpaper on heritage plaster, especially in pre-1978 Toronto homes where removal triggers lead-paint abatement costs of $2,500-$6,000 (HomeStars Canada 2026). Remove first when wallpaper is vinyl, embossed, lifting at seams, or shows any water damage — painting over these guarantees failure within 18 months. When uncertain, painting over wallpaper toronto specialists at established firms will assess for $150-$250.
FAQ: Painting Over Wallpaper in Toronto
Can you paint over wallpaper without removing it?
Yes, but only on paper-backed wallpaper with tightly sealed seams and no water damage. You must skim-coat all seams and use shellac- or oil-based primer (never latex) to prevent paste reactivation. Expect to spend $180-$320 in materials for a 200 sq ft room (HomeStars Canada 2026).
What primer should I use over wallpaper in Toronto?
Zinsser BIN shellac-based primer (~$72/gallon at Home Depot Stockyards) is the Toronto contractor standard because it seals wallpaper paste against humidity reactivation. Standard latex primers fail within months as Toronto’s seasonal RH swings between 20-55% (Environment Canada) reactivate the adhesive.
Will the seams show through if I paint over wallpaper?
Yes, unless you skim-coat each seam with lightweight joint compound before priming. This step reduces visible seam telegraphing by 80-90% (CertainTeed application data). Skipping it almost guarantees visible ridges within 12-18 months.
How much does professional wallpaper removal cost in Toronto?
Professional wallpaper removal in the GTA averages $3-$7 per square foot, plus $2-$4 per square foot for paint (HomeStars Toronto 2026). For a typical 200 sq ft bedroom, expect $1,200-$2,400 total. Pre-1978 homes may add $2,500-$6,000 for lead-paint abatement under Ontario Regulation 490/09.
Is it safe to paint over wallpaper in older Toronto homes?
It is often safer than removal in pre-1978 homes, where wallpaper may encapsulate lead-based paint underneath (Health Canada). Aggressive removal disturbs lead and triggers Ministry of Labour abatement requirements costing $2,500-$6,000. Painting over with proper primer maintains legal and safe encapsulation.
Can I paint over vinyl or foil wallpaper?
No. Vinyl-coated and foil wallpapers are non-porous, and paint will not bond — it beads up or peels within weeks. These wallpapers must be removed before painting, typically requiring 2-3 weekends DIY or $1,200-$2,400 professionally for a standard bedroom (HomeStars Canada 2026).
Before You Paint Over Wallpaper: Toronto Checklist
- Confirm wallpaper is paper-backed (not vinyl, foil, or embossed)
- Check every seam — re-glue any lifting beyond 1cm
- Test for moisture damage with a moisture meter (under 12% acceptable)
- If pre-1978 home, do NOT sand or scrape — paint over to encapsulate any lead paint
- Check condo bylaws for construction hour restrictions before scheduling
- Skim-coat all seams with lightweight joint compound
- Prime with shellac- or oil-based primer (never latex)
- Use 100% acrylic eggshell or satin topcoat for humidity resilience
- Get three quotes from HomeStars or BILD-member contractors if hiring out
- Budget for full removal + skim-coat ($1,800-$3,500) as a fallback
For more renovation guidance, browse our renovation tips, explore open-concept layout costs before knocking down walls, or read our best dehumidifier picks — humidity control is critical to making any paint job last in Toronto. For seasonal styling after the paint dries, see our seasonal decor ideas and vase styling guide. Looking for more buying-side guidance? Browse our buyer guides and bedroom organization tips.
Sources
- HomeStars Canada — 2026 GTA contractor rate transparency data
- Canadian Home Builders’ Association (CHBA) — Renovation cost surveys
- City of Toronto Building Department — Permit requirements
- Ontario Ministry of Labour — Regulation 490/09 (lead abatement)
- Health Canada — Lead in residential paint guidance
- Environment Canada — GTA indoor humidity records
- BILD (Building Industry and Land Development Association) — Renovator member directory
- CertainTeed — Joint compound application performance data
- Ontario Building Code — Section 9 residential construction standards
Priya Sharma | OAA Licensed Interior Designer Priya is a Toronto-based interior designer specializing in heritage home renovations across East York, Leaside, and the Beaches, with 12 years of experience navigating pre-war plaster and Ontario Building Code compliance. She writes regularly for Toronto Interior Designer on practical, evidence-based renovation decisions for GTA homeowners. (/author/priya-sharma/)
Balance Budget and Finish Quality
Mix accessible basics with a few standout pieces so the room feels layered rather than one-note.
Toronto Interior Designer may earn a commission if you shop through these links at no extra cost to you.
Frequently Asked Questions
Can you paint over wallpaper in Toronto without removing it?
Yes, but only on paper-backed wallpaper with tightly sealed seams and no water damage. Skim-coat all seams and use shellac- or oil-based primer (never latex) to prevent paste reactivation. Budget $180-$320 for a 200 sq ft room.
What primer works best over wallpaper in Toronto’s humidity?
Zinsser BIN shellac-based primer (~$72/gallon at Home Depot Stockyards) is the Toronto contractor standard because it seals wallpaper paste against humidity reactivation. Latex primers fail within months as GTA seasonal RH swings from 20% to 55%.
How much does professional wallpaper removal cost in the GTA?
Professional wallpaper removal in Toronto averages $3-$7 per square foot, totaling $1,200-$2,400 for a 200 sq ft bedroom. Pre-1978 homes may add $2,500-$6,000 for lead-paint abatement under Ontario Regulation 490/09.
Toronto Interior Designer is editorially independent. Our recommendations are based on research and editorial judgment, not brand sponsorships.